Step By Step tutorial on repairing a Rolleiflex SL350 camera.
Once in a while you have to do some certain repairs, or adjustments on your beloved antique cameras even if you are taking a good care of them, or just store them in a vitrine.
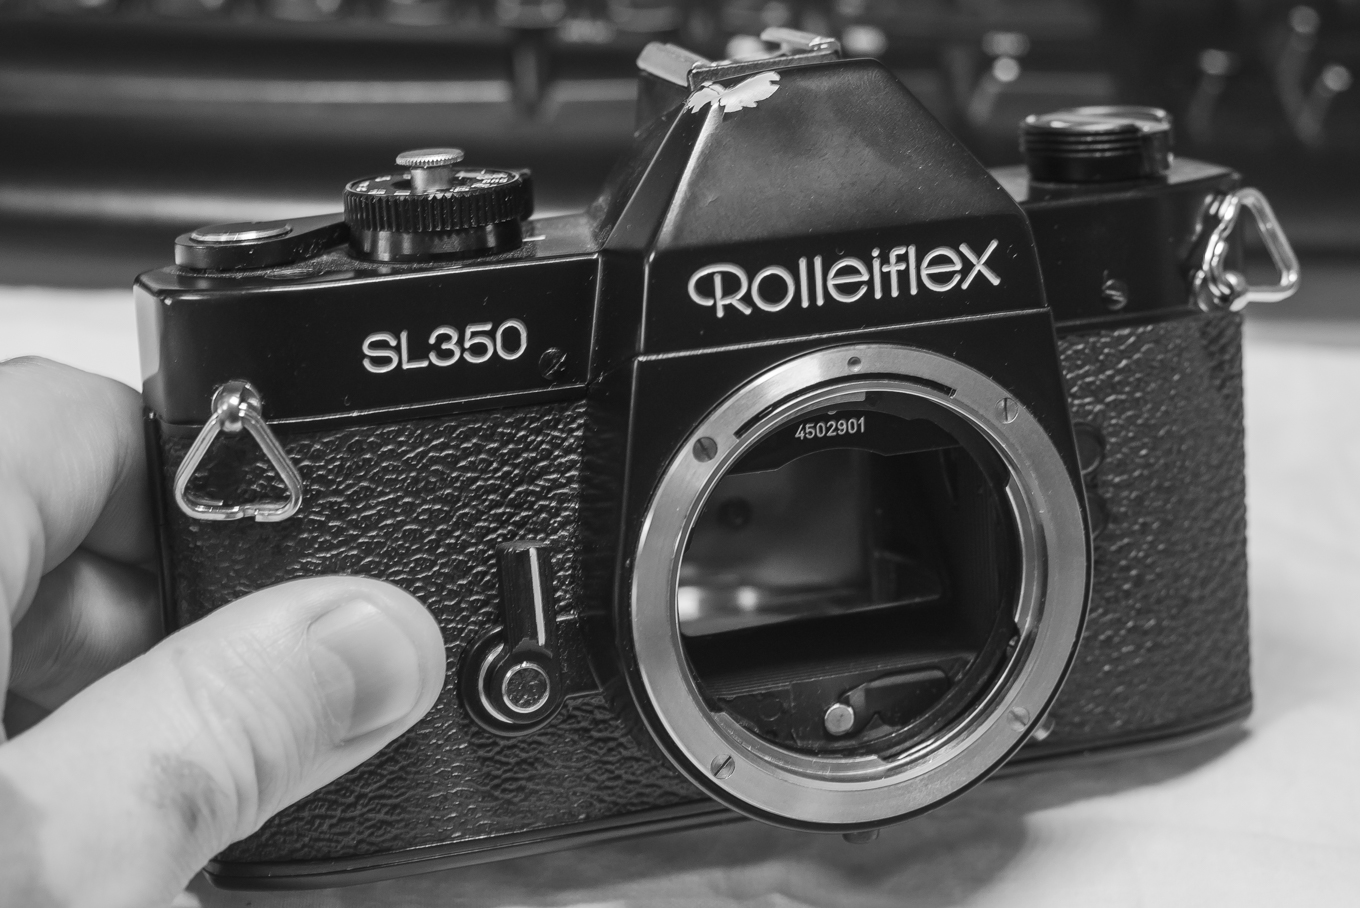
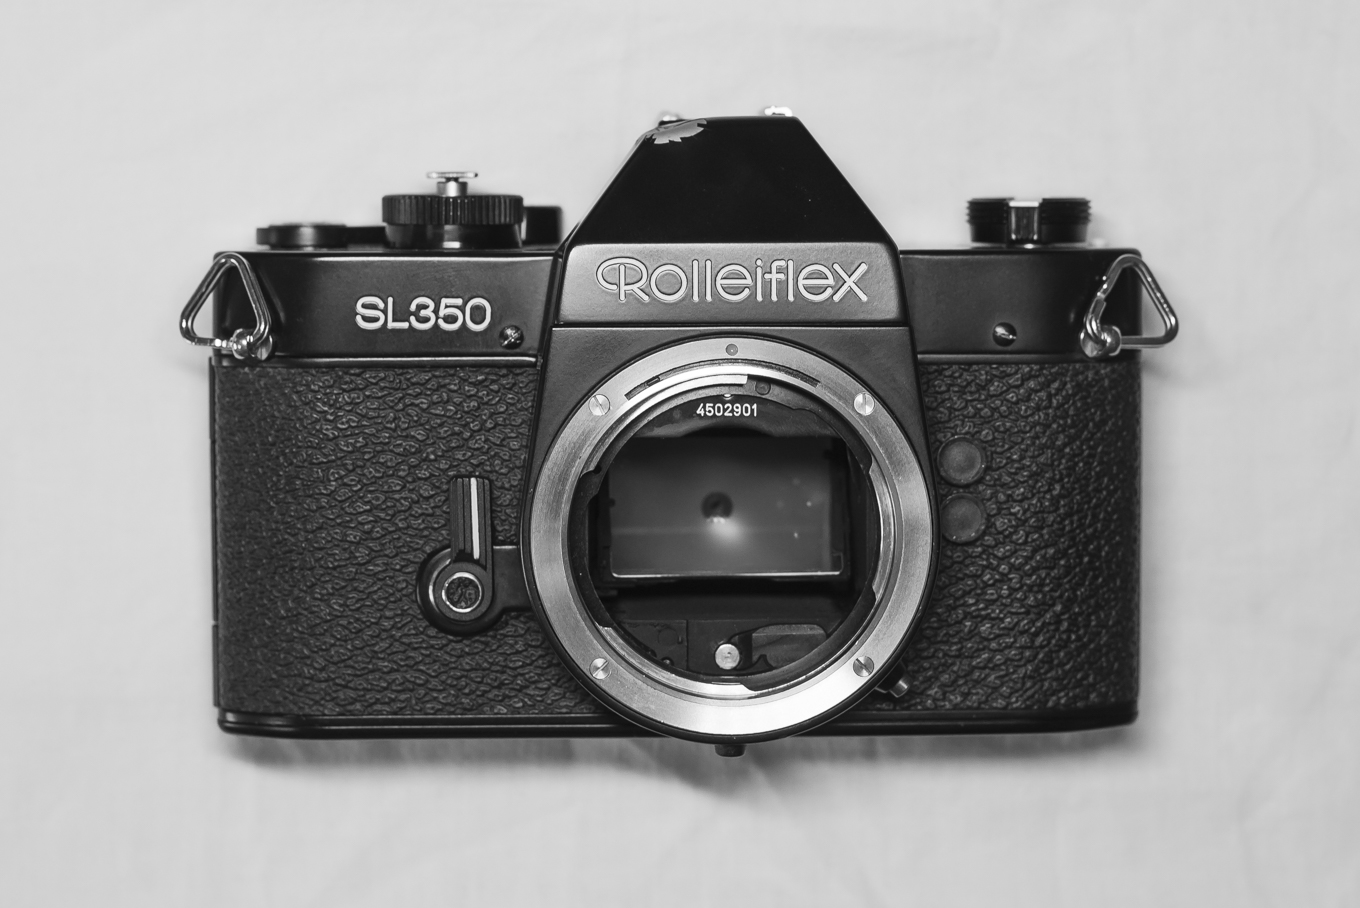
This time i’ll dissasamble a Rolleiflex SL350, which is basically the last west-german 35mm slr camera. The camera is in a nice condition cosmetically, but have some issues with the bumped top panel, and also the shutter is stucked…
Before you’d start this time consuming but very worthy process, you will need some tools, and accessories to repair with, and store your camera parts within.
I will only use very basic tools, so you do not have to spend thousands on useless tools. You will need some screwdrivers with different head attachements, and some do it yourself “extra” (but really not so special) tools, for certain repair sessions.
Take a deep breath,… and LET’S DIVE INTO it! 🙂
First, get a soft, prefearably white colored cloth. We will use it as a base protecting surface for our repairs. We do not want our camera to be scratched, or damaged, and also when some accessories accidentely falls of while repairing, it’s easier to find on a white cloth, since most of the moving parts are darker colored 🙂 So get your old white t-shirt. And lay it in front of you, on the table (make it double folded).
Get an adjustable desktop lamp. If you have One with the magnifier glass, you are more than good.
Get some plastic case, box, or anything, that you can safely store the small camera parts.
Get a small repair toolkit like the one shown on the foto, or similar. You really don’t need to spend to much on this, but if you can, than avoid cheap Chinese stuff, cause you will probably use this tools more than once.
Removing the Rolleiflex sl350 bottom plate
Put your camera down the cloth, laying with the bottom part upwards! The reason why we remove the bottom part first is that the inside of the upper area is full of small parts that can fall off, or harmed easily.
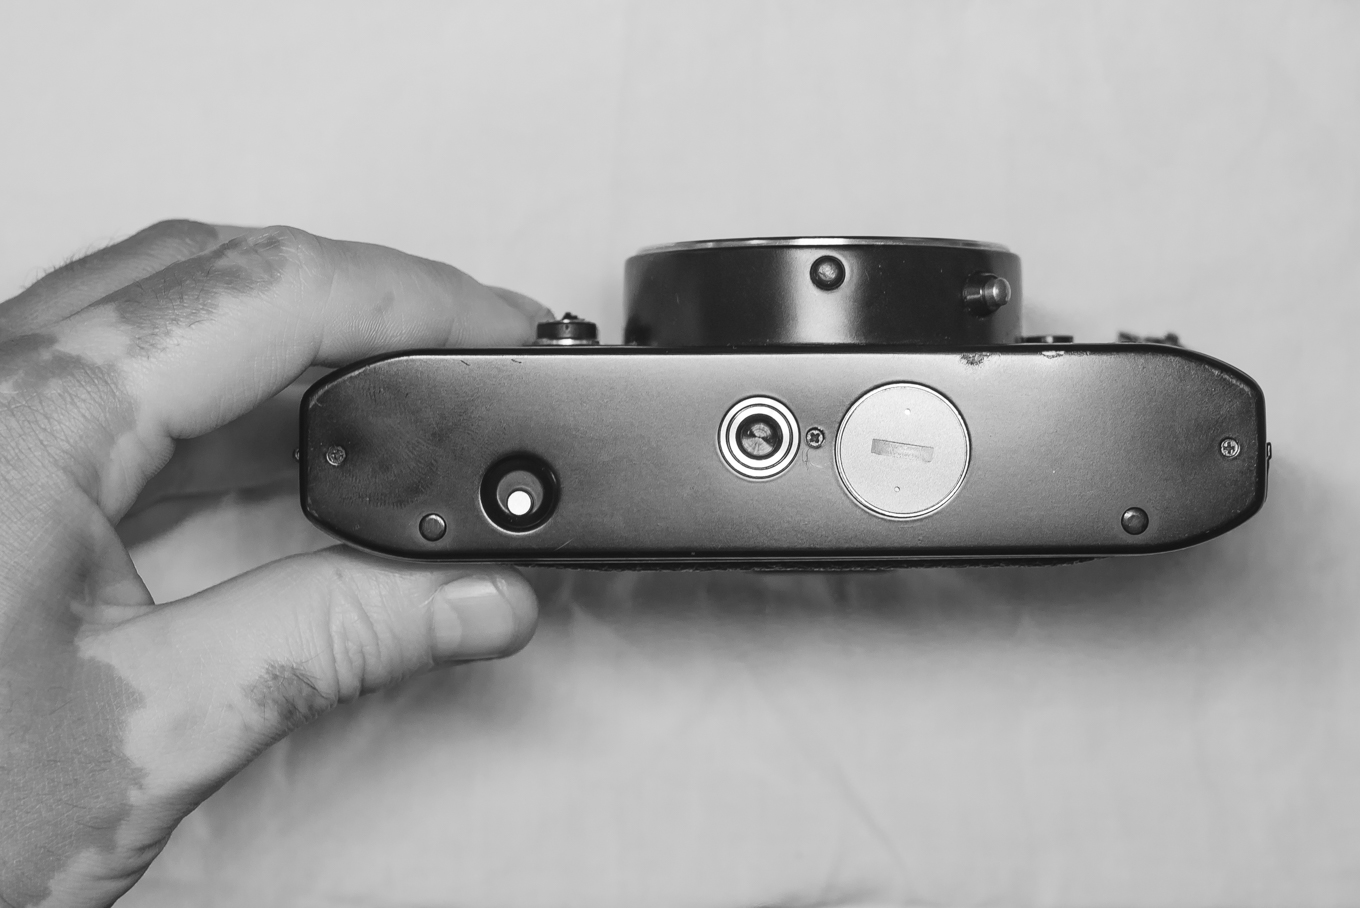
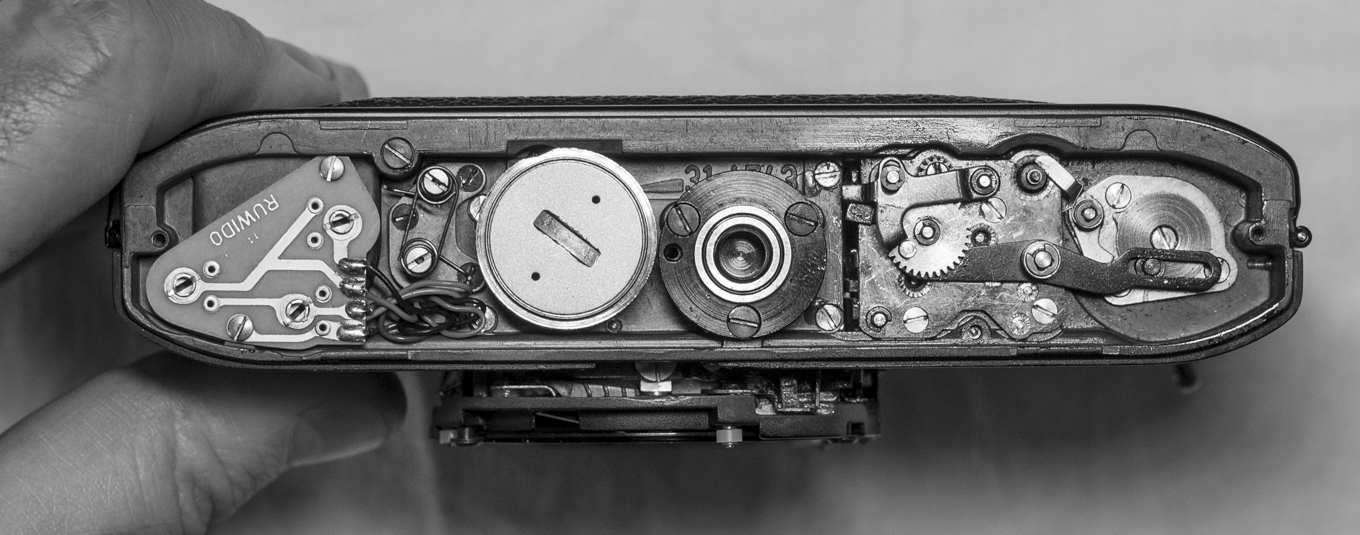
Use a small star headed screwdriver to remove the thre 3 bottom screws, then carefully lift up the bottom plate. (You do not need to remove the battery cover to do this.) Always make sure, that you choose the right sized attachement head for your screwdriver, otherwise you will be left with a stripped or broken screw. (You definitely don’t want that!)

Shutter states
Note that mirror should be down at any states (released, or tensioned)!


Removing the top plate of a Rolleiflex SL350
Once you’ve removed the bottom plate of the camera, it is time to remove the top plate. Turn your camera over so now the bottom part is sitting on the table’s surface.
- First we remove the front, and back screws on the top plate. (I assume you can do this without any further description on this topic)
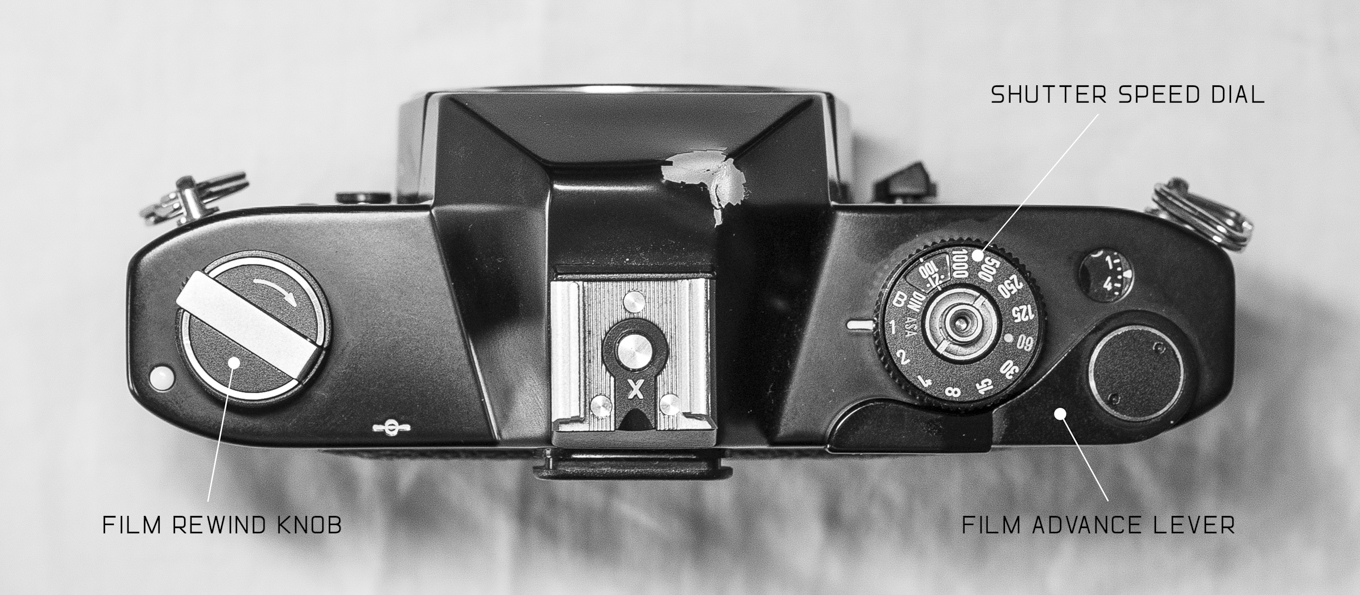
- We’re going to remove the Shutter Speed Dial,
- then we go on with the Film Advance Lever
- then we will finish with the Film Rewind Knob
You will need 3 tools for this.
Removing the Shutter Speed Dial
Inside the shutter speed dial, there is a small cylindrical screw, with the release button inside. (By the way, i think this was a very clever idea from the Rollei guys for positioning the shutter this way.)

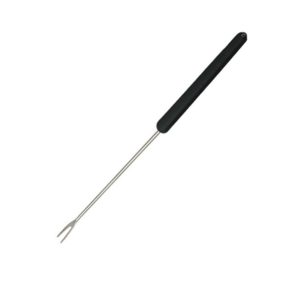
You will need a u shaped screwdriver to remove this cylindrical screw. You would not guess what i will use instead the screwdriver. A modified Fondue Fork. What??? Yes!!! I know 🙂 I took of the week plastic part and used a pliers to have a strong grip.
Attention! It’s always a good idea before this process to turn the speed dial to a certain position. I turned it into 1 sec, and the ISO (ASA) to 100. Sometimes I tend set the shutter speed to 4, and the ASA 400.
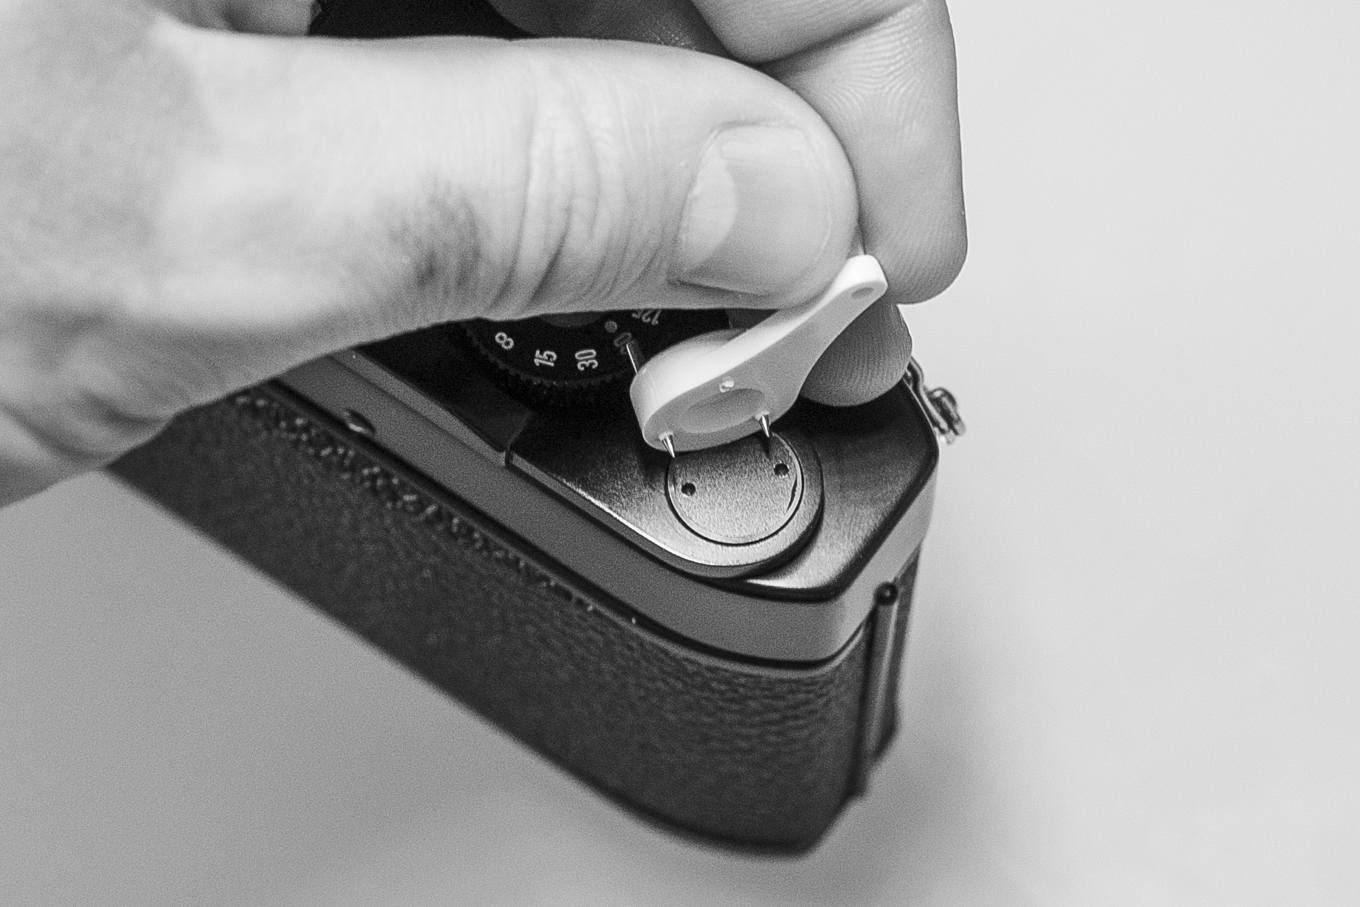
Fit the end of the Fondue Fork inside the holes and carefully turn it into counter clockwise while holding down the speed dial knob preventing from turn.
Removing The Film Advance Lever
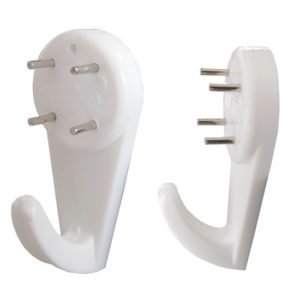
If you liked my fork tool before, you’ll definietly like this One as well 🙂 If you take a close look at the top of the advance lever you’ll see a flat cylinder with too tiny holes. You could use an adjustable Spanner Wrench tool. But i won’t. My special tool for this procedure is a plastic picture frame hanger with four steel spikes inside. I know what you think, but it works perfectly. Remove the lover 2 steel spikes from it, and use the other stingy side slightly pulled out (2-3mm). Fit inside the holes, hold down the advance lever preventing from turning, and start loosen the round plate by turning it counter clock wise. A 1$ tool that works 🙂 Not bad, huh?
Small silver ball
When you take off the top of film advance lever, be careful not to lose the tiny metal ball, which sits into the levers plastic hole.


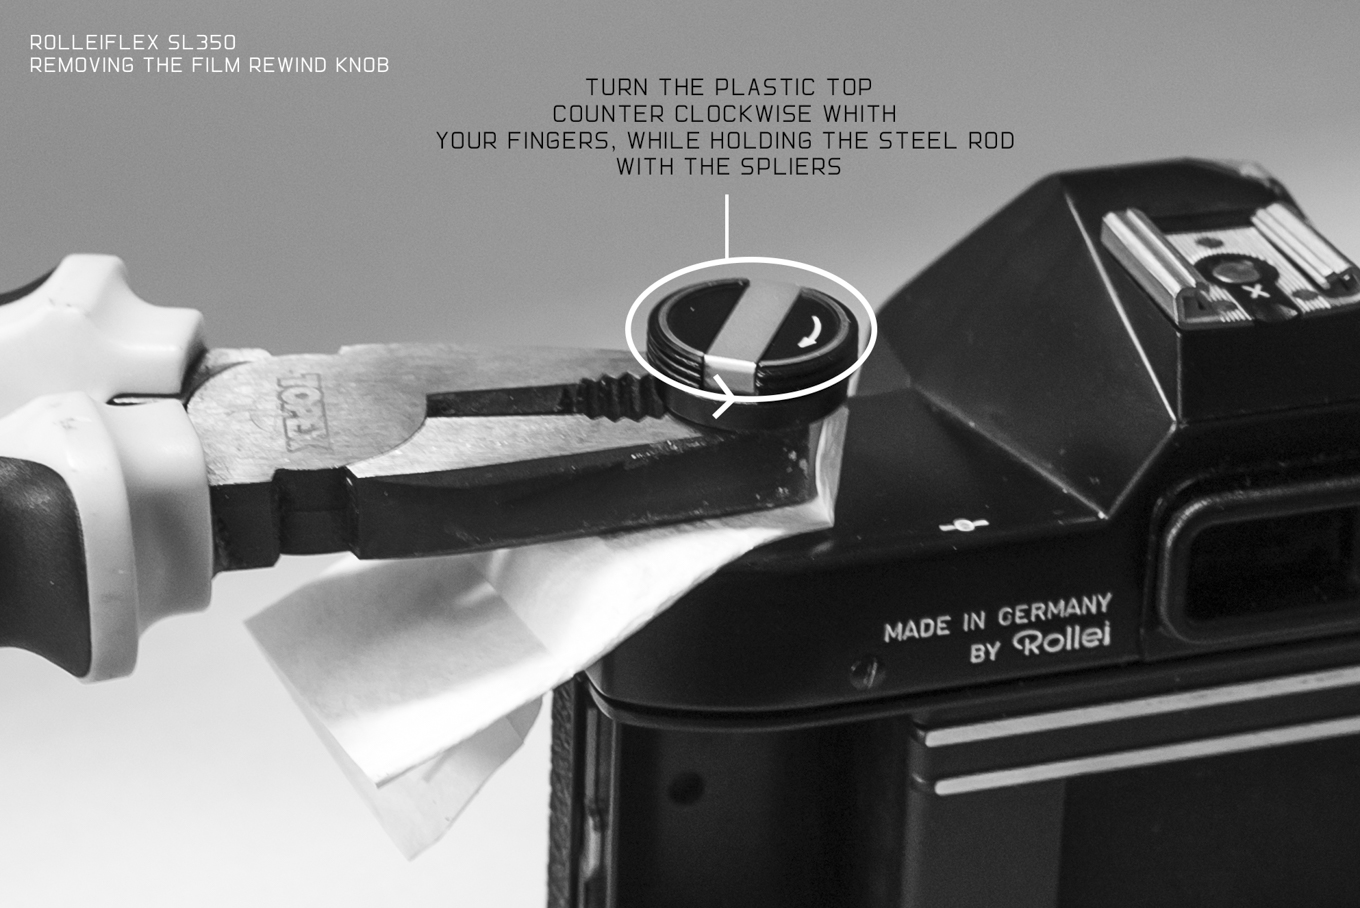
Remove the Film Rewind Knob
At this time no special tool needed just pliers. Pull out the film rewind knob with your fingers. Pull the top until the back of the camera is opened, and you have enough space to move the pliers underneath the knob to hold the steel rod tight. Turn the plastic top part to the left while it comes off. Use a paper, or small cloth underneath the pliers, that will prevent scratching the top surface. (A top plate will cost you a lot. On e-bay is about 150Eur!)
If the film rewind shaft falls into the body.
Well, it can happen. But luckily it is easy to solve, even if the back door is closed.
This is how the rewind shaft looks like.

When you try to put it back to its original place, you have to do it from the inside of the camera body. There is a little ring that prevents shaft to fall out, or go in so that you have to pull out a bit to be able to get the shaft back into its original place. See the next image below.

Please come back later the story will be continued soon… (Last updated: 2019.04.16)